

It was a regular Tuesday morning. I sat there on my bedroom floor peering into the master bathroom. I had no intention of taking on a DIY project that day. Mike was getting ready to paint the basement bathroom and asked if I wanted to paint the master too.
Sigh.
I disliked my bathroom. So ugly and dark and outdated. I knew I didn’t want to spend $10,000 remodeling, I guess a new paint color did sound nice.
I looked around the bathroom trying to decide which wall color could possibly disguise the obnoxious outdated tile. I thought no wall color would make it better. After all, we’ve already painted it 3 times before and I didn’t like the room any more than the last time we painted!

So I started Pinteresting a bit from my phone. I made a discovery. People have actually painted their tiles and it looked incredible! In that moment I got so excited.
You know how you just get so excited about something that nothing can stop you? That was me. I felt like I had just struck gold!
I sent Mike a text: I am so excited! We are painting the tile in the bathroom, DO NOT try to stop me 🙂
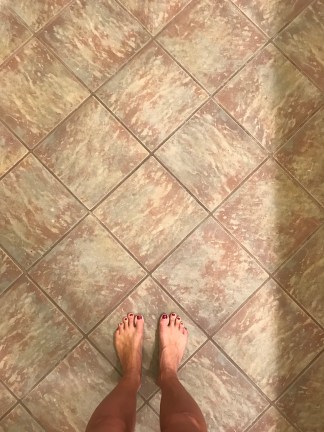
After snapping a few before pics, off to Home Depot we went.


I grabbed all the supplies, primer, white paint for the walls, dark paint for the floor, sealer, and spray paint for the counter.
I just asked the man what was good for tile, and he directed me to the paint that is good for brick and stucco.
Once home, we began priming. Every inch of tile got coated with the primer.


Next the the floors got a coat of dark grey and the walls got a new coat of paint as well, a light grey that covered up the green.


Now we were ready to tackle the cabinets. I found a milk paint on Amazon that had good reviews and decided to go with the chocolate brown color to match the mirrors. I’ve already painted our kitchen island in the past so I felt pretty confident with this.
The key to good painted cabinets that won’t chip is to sand them down first. This is a little tedious but well worth it. You also have to take off the faces and remove all hardware. A little prep goes a long way. I coated the cabinets with two coats of paint and one coat of sealer.


The next part was the most scary of all. I decided to use a stencil on the floor. I found a few blogs that had done this and I just loved the final look. But honestly I wasn’t really sure I could pull it off.
I ordered the Augusta tile stencil from Cutting Edge Stencils. I placed the stencil on one tile at a time and used a small foam roller. It was starting to turn out just as I hoped!
A few things I learned about stenciling:
- When rolling onto the stencil, don’t use too much paint otherwise it bleeds. The drier the better.
- To do the whole bathroom floor I had to skip every other tile and let it dry a couple hours in between.
- Afterwords, I used a small brush (taken from my kid’s painting supplies) to gently do some touchups with the white paint.


We also spray painted our vanity counter top. First we gently sanded and then two coats of spray paint went on. Spray paint is so cool! It comes in all different colors and textures, you can really transform just about anything from vases to patio furniture.
The results were pretty and clean but I DO NOT recommend doing this if you are an essential oils user. Unfortunately those little buggers will destroy your freshly painted counters if they come in contact with the surface. This is almost impossible to avoid and we actually ended up sanding and spraying them more than once because of this.


As for the tiles and the cabinet, they are holding up wonderfully! No chips, no scuffs, and they still look the same as the day we painted them 5 months later. The sealer coats are critical here. We applied four coats of clear sealer to all the tiles, with a foam roller.
Sooooo drum roll please!! Here is the final product!
I am absolutely in love with our new bathroom, it feels modern and bright, just as I imagined. It was a huge leap of faith and I’m so glad we did it (insert muscle arm emoji here).


Before and After

This project was so much fun for me. It felt great to make something with my hands. I hope this inspires you to get out there and do something a little risky and a lotta creative.
xoxo
Agnes

Great job Agnes 🤗🤗🤗💖💖💖🍀🍀🍀